
The 1-Tap Segmentation Trick in Klaviyo: Personalization Without Quizzes
Every e-commerce brand talks about personalization.
But here’s the problem: most stores rely on clunky pop-ups or long surveys to “get to know” their customers. Shoppers don’t want to fill out forms - they just want to click, browse, and buy.
This is where Klaviyo’s profile-updating buttons come in.
Instead of asking people to answer 10 questions, you can drop a single, one-tap choice into your welcome email. That one click both:
- sends them to the right product collection, and
- updates their Klaviyo profile with a preference you can use forever.
It feels like magic to the subscriber - and it gives you clean, zero-party data without friction.
In this guide, I’ll show you exactly how to set up a “click-to-segment” welcome email in Klaviyo, step by step. Even if you’ve never customized profile properties before, you’ll be able to follow along.
What you’ll need
- A Welcome flow that triggers on Joins List: Newsletter
- 3 collection pages (or any URLs) to send people after they click
Step 1 - Build an email with property-setting buttons
In your Welcome #1 email, you’ll add three buttons that both update a profile property and send the subscriber to the right page.
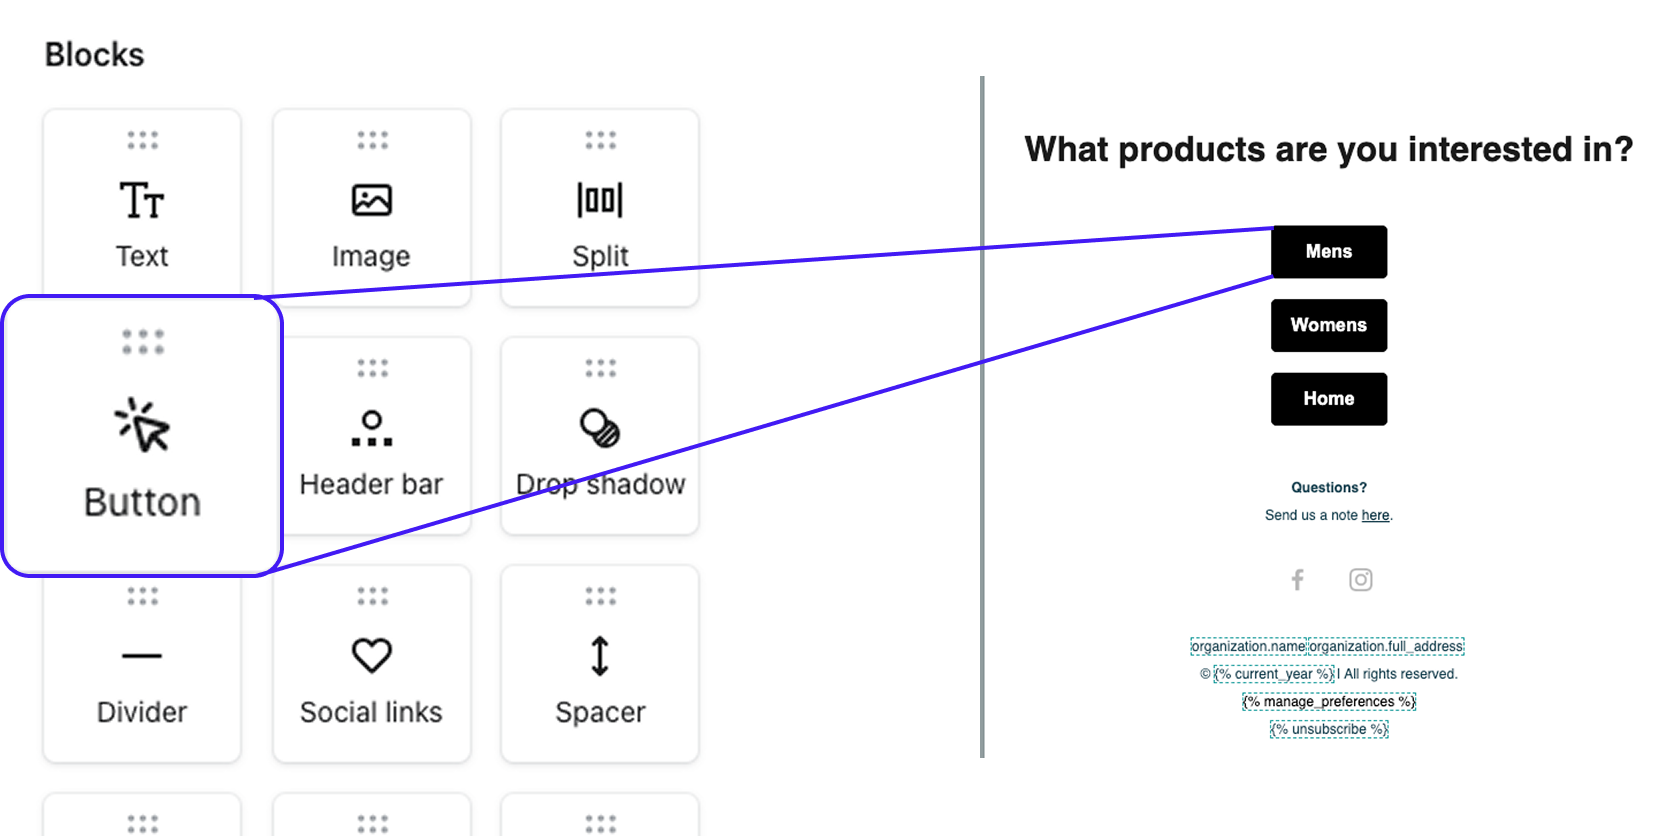
Think of each button as a little 3-part instruction card:
{ Property Name → Property Value → Redirect Link }
So for an apparel brand:
- 👗 Women’s Styles
→{% update_property_link 'style_preference' 'Womens' 'yourstore.com/collections/womens' %} - 🏡 Home & Decor
→{% update_property_link 'style_preference' 'Home' 'yourstore.com/collections/home' %}
👕 Men’s Styles
→ {% update_property_link 'style_preference' 'Mens' 'yourstore.com/collections/mens' %}

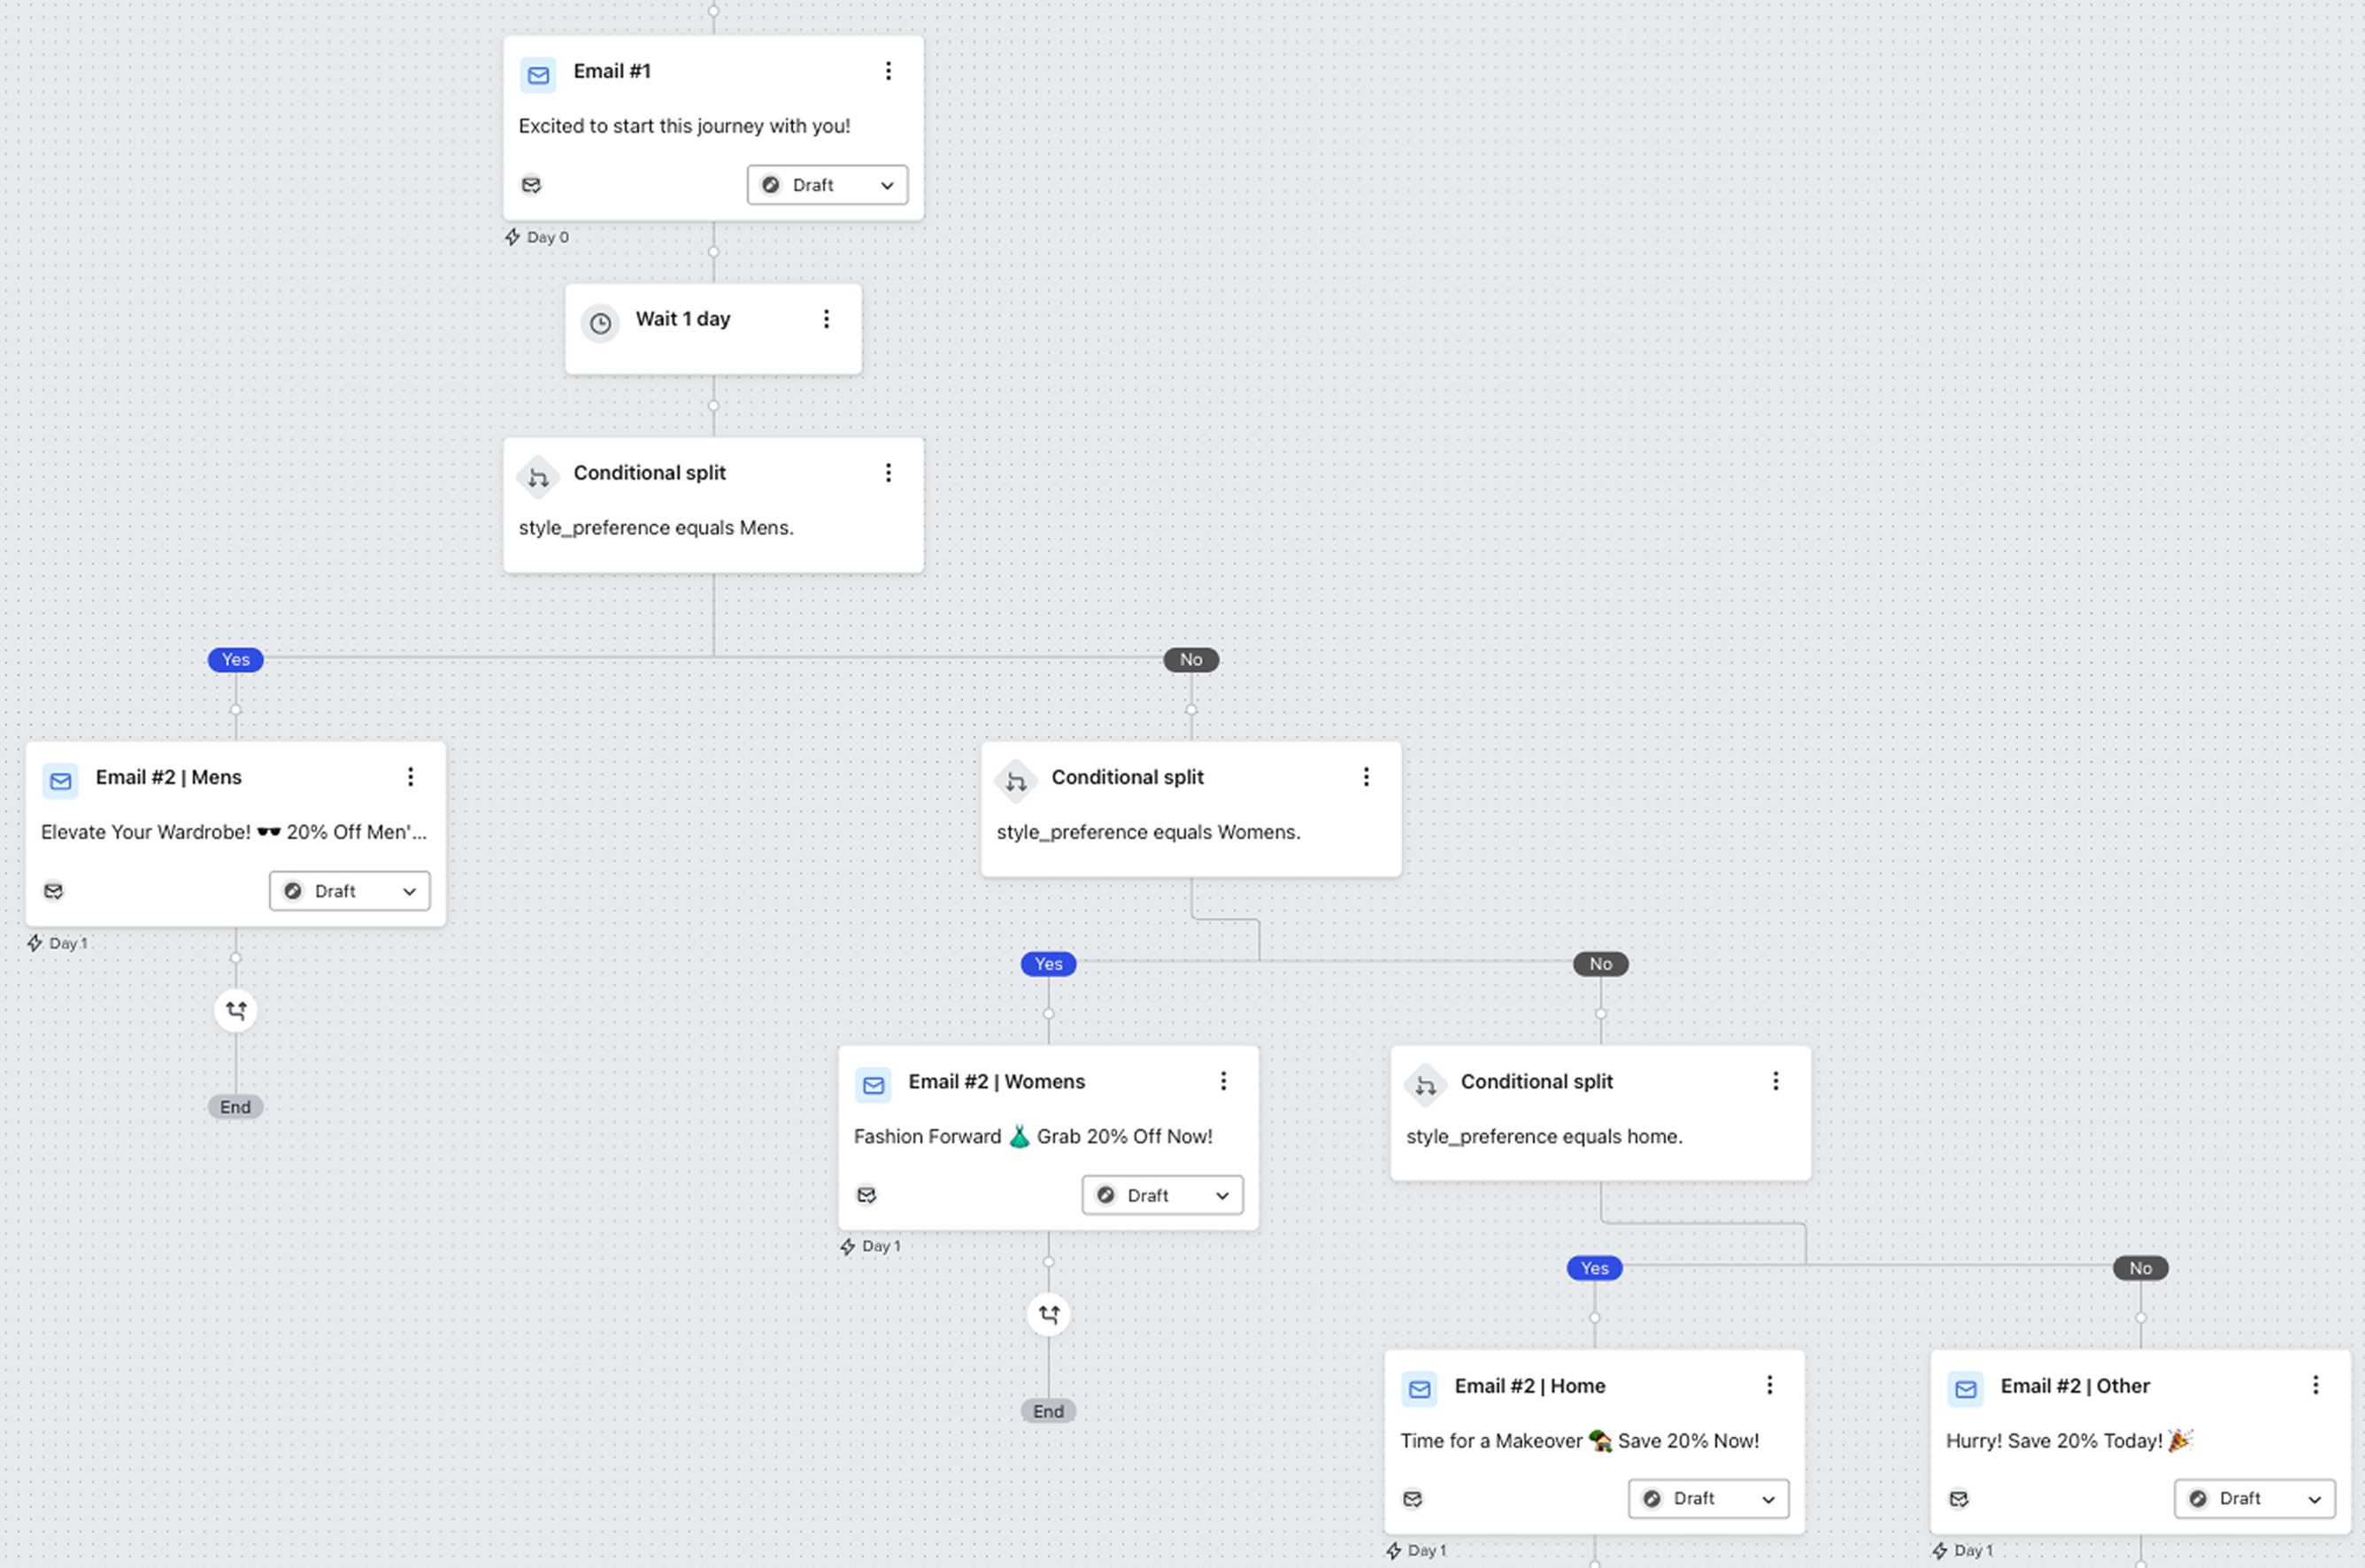
Step 2 - Wire the flow logic (branch on the property)
- In your Welcome flow, after Email #1 add a Conditional Split.
- Rule: Properties about someone → style_preference equals Mens.
- YES → send Welcome #2 — Men’s Picks
- NO → add another split:
- style_preference equals Womens → send Welcome #2 — Women’s Picks
- Else → send Welcome #2 — Home Picks (or a reminder email)
Using the property for routing is cleaner than URL-contains logic and works forever (even outside that first email).
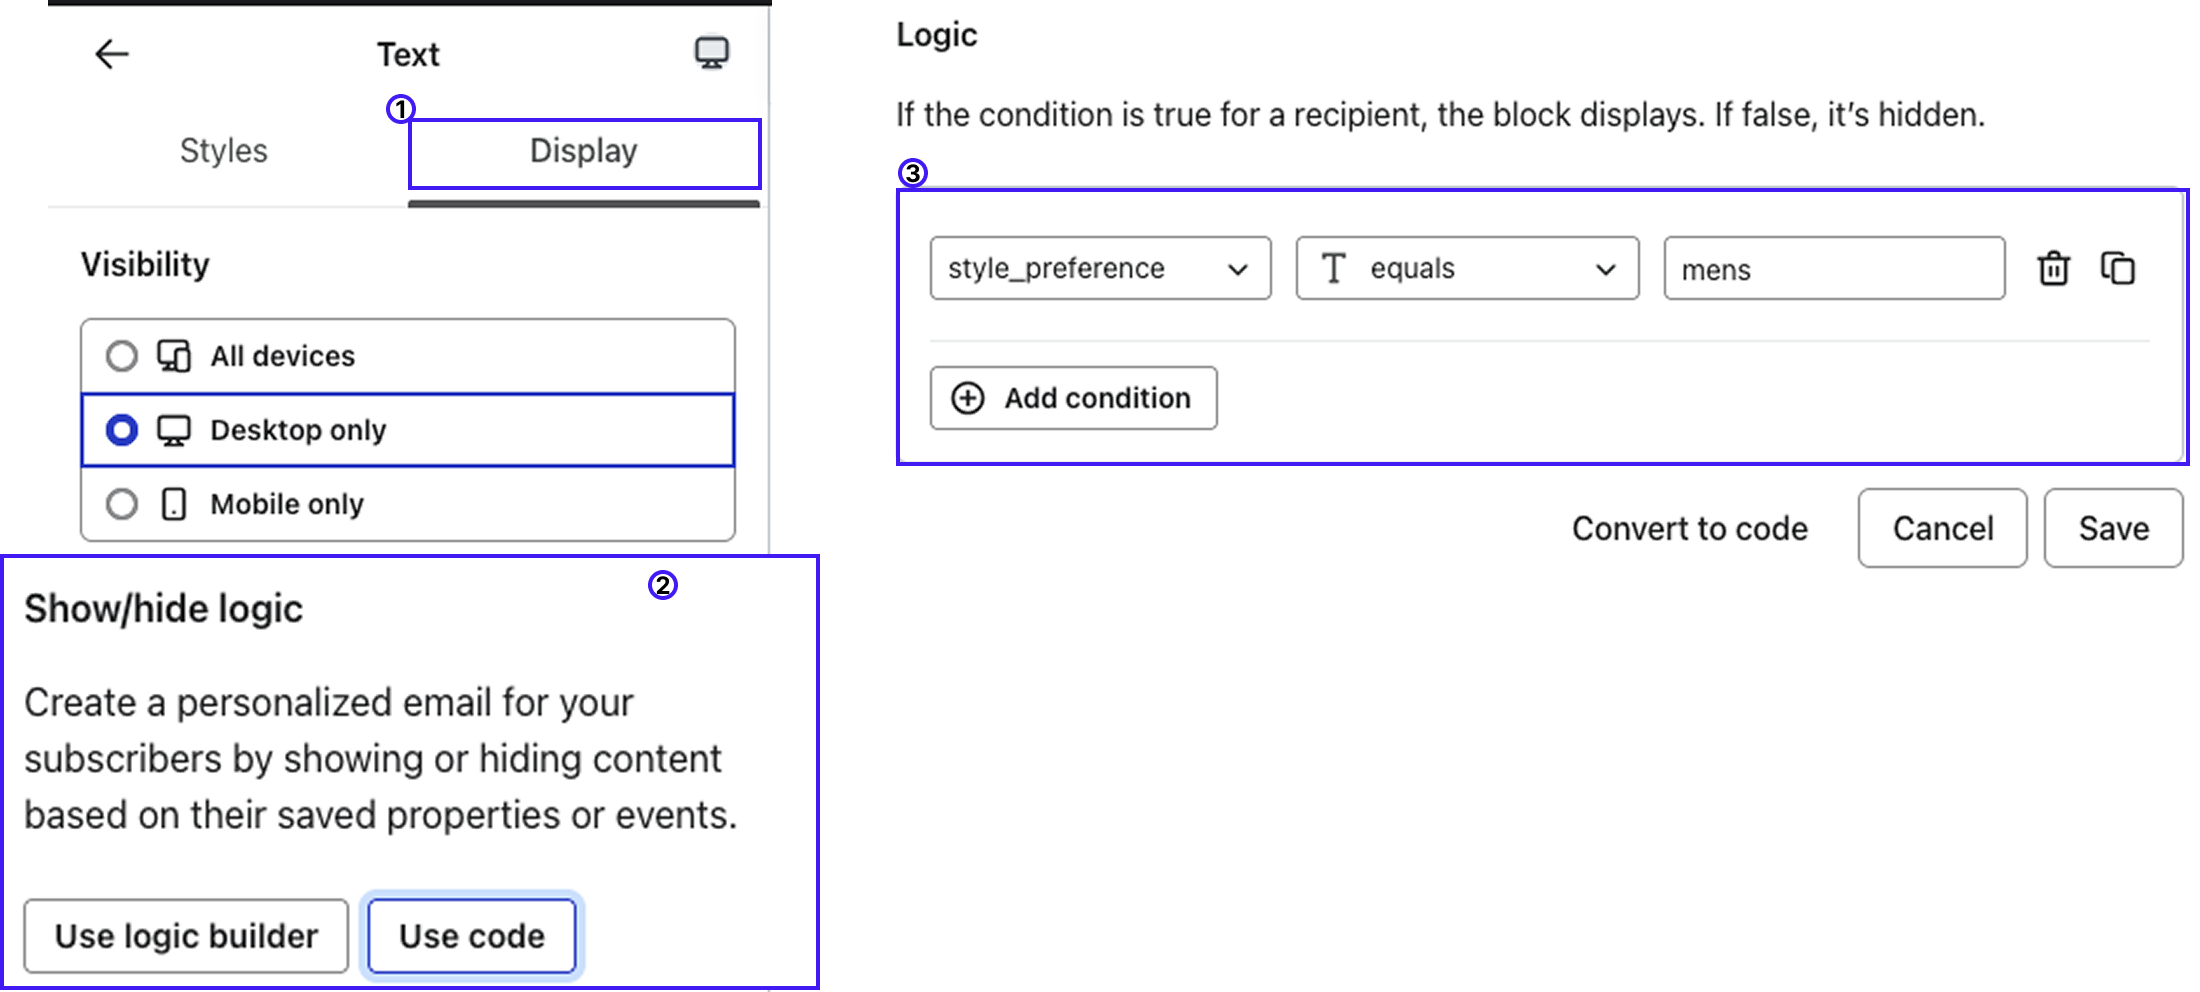
Step 3 - Personalize content inside emails (optional but powerful)
If you prefer a single follow-up email with conditional blocks:
- Select any block → Display Options → Show/Hide Using Conditions
- Show Men’s block when:
person|lookup:'style_preference' == 'Mens' - Show Women’s block when:
person|lookup:'style_preference' == 'Womens' - Show Home block when:
person|lookup:'style_preference' == 'Home'
- Show Men’s block when:
(Leave a default block visible if no preference yet.)
Step 4 - Segments to reuse everywhere
Create these segments so you can target campaigns later:
style_preference equals Mensstyle_preference equals Womensstyle_preference equals Homestyle_preference is not set(use for nudges/second question)
Step 5 - Copy you can paste (super short)
Subject: Tell us what you want to see (1 tap)
Headline: What do you want more of?
Buttons: Men’s • Women’s • Home (each set style_preference + redirect)
Reminder email (for non-clickers)
Still there? Pick a lane so we can send the good stuff.
[Men’s] [Women’s] [Home]
(Use the same property-setting buttons here.)
Step 6 - QA & pitfalls (save yourself headaches)
- Case consistency:
Mens≠men(pick one format and stick to it). - Test on real test profiles: Clicking a test email will set the property-use separate profiles for each branch.
- Button tracking: Leave click tracking on (you still get CTR).
- Fallback: Make sure the Else path has a solid default if no click/property.
- Naming: Don’t rename the property later; it breaks splits/segments.
Step 7 - Metrics to watch
- % Self-segmented: clicks on Welcome #1 / delivered
- Revenue per recipient by
style_preferencecohort - Unsubs: personalized vs default path
Bonus: second question (stack later)
In Welcome #3 or #4, add another 1-tap property question (e.g., Budget: Under $50 · $50–$100 · $100+ with property budget_band).
Same setup: Button → Update profile property → branch on budget_band.
Member discussion